
Suffice it to say, I've wanted to be able to carbonate my own water at home for a long time. I even went so far as to buy a relatively expensive home carbonator, which worked out fine until the CO2 cartridges were empty and it came time to have them refilled. It was at this point (after seeing the refill price) that I came to fully understood the business model of home carbonator providers:
- Sell the carbonator at a reasonable price
(a one-time event). - Charge an exorbitant fee for CO2 refills
(forever after).
It's a good model really ... for the seller, but unfortunately it removes a significant amount of the cost-competitivness of carbonating at home (versus buying bottled fizzy water in a local grocery store). Not only that, the company I bought my home carbonator from went through an awful lot of trouble to make it very difficult for me to bypass their CO2 filling mechanism ... every fitting that could be made propietary was made that way (such that one dissatisfied customer even looked up the patent on-line to figure out how the fill-valve works on the CO2 tanks, so he could re-fill the tanks at home).
I have to admit it really didn't help that I live in the United States and that when I went to look for an adapter to bypass the CO2 tank, a guy [literally] said to me:
That metric thread is some European shit, we don't have any of that here.
As it turns out, bypassing isn't such a good idea, as the carbonator I bought also wastes a lot of CO2 (go figure). The CO2 drives a propellor, which is used to agitate the water (agitation helps the CO2 permeate the water better), and there's also a relief valve that kicks in and lets all of the CO2 out (presumably to get some flow going). This all adds up to a lot of CO2 wasted, which I'm pretty sure is by design.
I was pleasantly surprised to see a lot of other people are interested in carbonating at home.
Most DIY carbonators use a 2-liter plastic bottle, a stainless-steel automotive tire-fill valve, and an air chuck. They're very simple to make, and very simple to use:
- Fill the bottle 2/3 with water
- Squeeze the bottle to let all of the air out
- Screw the cap on
- Fill it to 30-40psi with CO2
- Shake the hell out of it
- Voila! Fizzy water
The only problem being I wanted to carbonate in a glass bottle, and as I read more and more online about this problem, I learned that the "manual shaking" part was problematic for many people (hint: it gets old after a while), so I wanted to see if I could do better.
The 1st design was a simple stainless steel fill valve and an air chuck (shown in FIGURE 1). I followed standard operating procedure[0], the only difference being I used a wine bottle and screw-on wine cap.
Two problems quickly arose:
- There is no way to remove the air that's caught at the top of the bottle after the cap is screwed on.
- The glass could potentially shatter during carbonation, which would be bad indeed.
I quickly abandoned this design, but it's shortcomings informed design number two, which as of this writing is in "protoype" phase (meaning I need to make it easier to use) but is carbonating water just fine.
As I read up on the carbonating process, I found out that there are several critical factors involved:
- Water Temperature: The colder the water, the easier it wll absorb CO2.
- CO2 Pressure: You need approx. 40psi of pressure to carbonate water.
- H2O Agitation: A little agitation of the water goes a long way to assisting carbonation.
- Flow helps: Meaning, I need to get a CO2 flow going (IN and OUT of the bottle) to replace the air that's trapped at the top of the bottle once the cap is screwed on.
These formed the basis for my prototype design.
I decided to make a dual-flow (IN/OUT) carbonator using two 1/8" copper tubes running through a small 3/8" threaded brass plug. That way, I could "install" the carbonator into any cap that I wanted to, while I searched for the best bottle to use for carbonating.
FIGURE 2 shows the basic assembly. The key part is the aforementioned copper tubing assembly with the threaded brass sleeve. Since I couldn't find this part pre-made anywhere, I had to have it custom made. I found a local welder who did the job for $20.
(NOTE: OD = outer diameter, ID = inner diameter.)
I gave Rick the welder:
- Three 1" long sections of 1/4" copper pipe.
- One 9" long section of 1/8" copper pipe.
- One 2.5" long section of 1/8" copper pipe.
- A 3/8" brass lock nut.
- A 3/8" OD, 1/4" ID threaded brass plug, approx 1" long.
- A hand-drawn picture of my design.
All parts came from my local hardware store and cost approximately $10.
Since the assembly had to be food-safe, he used silver solder to weld the copper in place and seal the inside core of the threaded brass plug. Once this was done, I assembled the rest by myself. It's also worth noting that the top of the assembly has to have enough clearance to get the 1/2" flex tubing on it (shown in FIGURE 5).
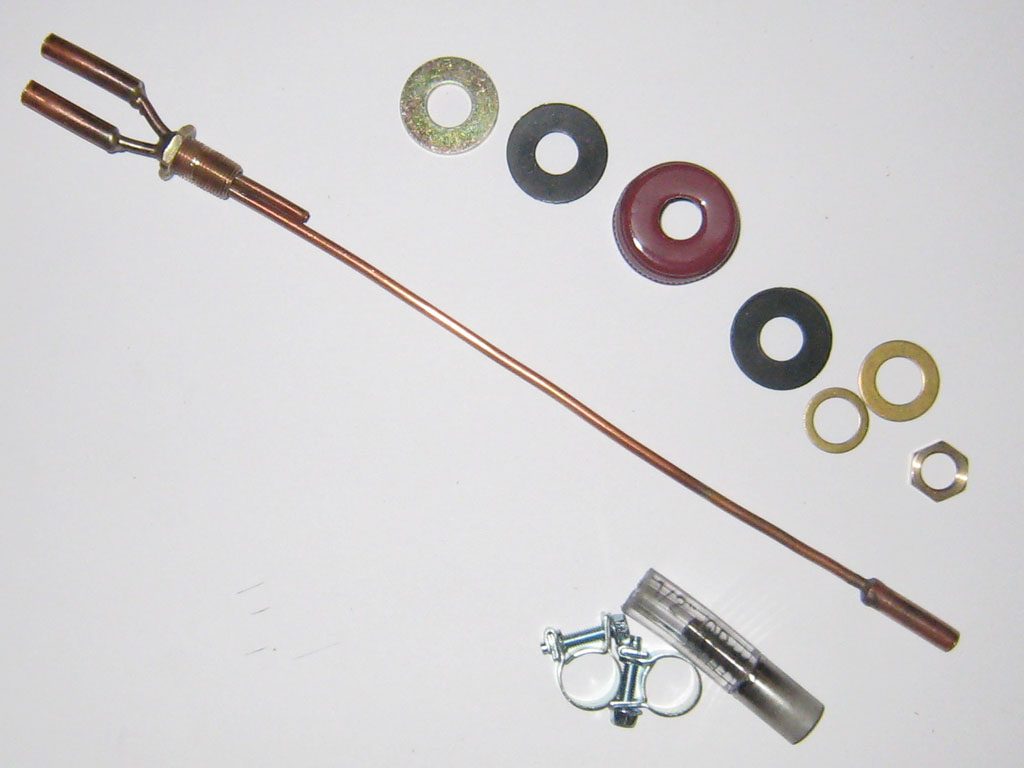
FIGURE 3 shows the assembly with all of the parts labelled. Additional parts for the assembly were as follows:
- A 2 micron carbonation stone for $20 from a local home-brew supply shop.
- 5' of a 1/2" OD, 1/4" ID flexble tubing from the same shop.
- Four 1/2" stainless steel retaining clips (for the hose & carbonation stone subassembly).
The parts are layed out on the paper in the figure in the order they're assembled ... meaning at the top of the assembly is (a) the 3/8" brass lock nut - then follows, in order, (b) the brass washer (c) the rubber washer (d) the wine bottle cap (e) the 2ns rubber washer (f) the brass machine bushing and (g) the 2nd 3/8" brass lock nut.
I drilled a home in the center of the screw-cap using a slightly bigger than 3/8" bit. The
cap is considered to be "throw-away", meaning I can replace it later if when it
wears out.
The bottom of the assembly just uses a short piece of flexible tubing to attach the carbonation stone to the 1/4" copper tube.
FIGURE 4 shows the assembly all put together, only it's worth noting that the hose clamps at the bottom (that hold the carbonation stone on) had to be replaced by stainless steel retaining rings, so they would fit down the mouth of the wine bottle during carbonation assembly itself.
FIGURE 5 shows the completed top of the assembly. This was just 2 short pieces of flexible tubing, 4 1/2" hose clamps, and 2 quick-release air-couplers. I bought this addt'l hardware at Home Depot.
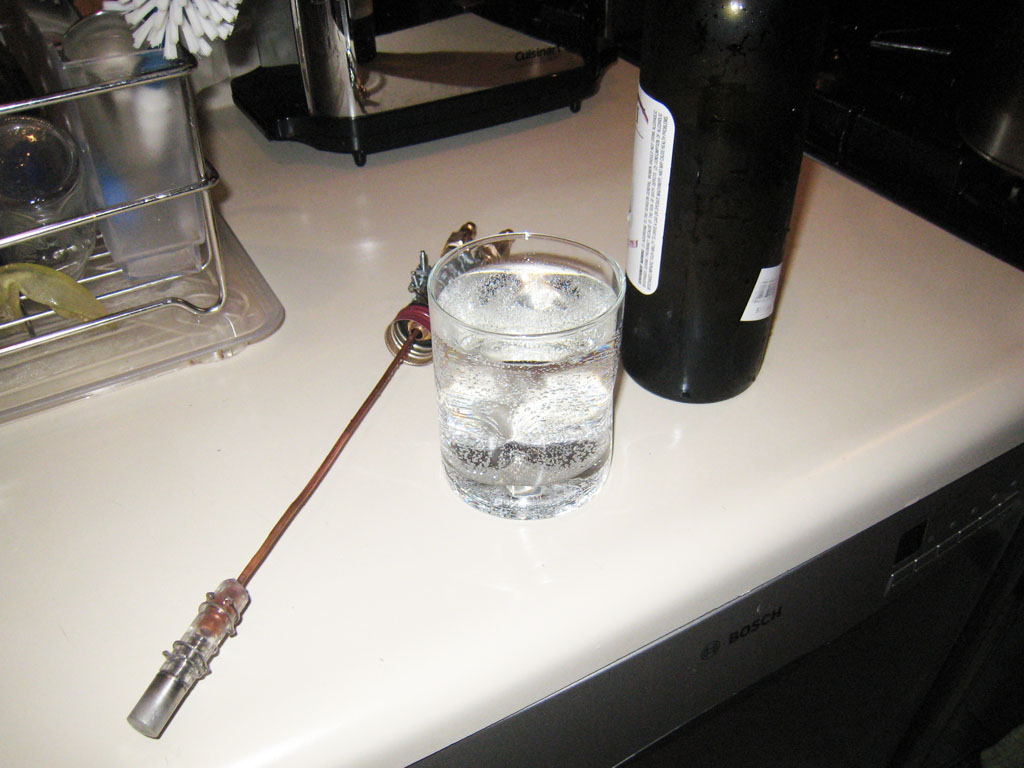
FIGURE 6 shows the assembly with the stainless steel retaining clips I eventually ended up using. This is the closest I have to a final picture of the carbonator.
FIGURE 7 shows a closeup of the underside of the wine screw cap. This is important because the wine bottle has to seat up against the rubber washer - that's what seals the bottle during the carbonation process. This means that the lock washer & machine bushing have to fit completly inside of the mouth of the wine bottle - so they have to be 3/8" ID but as small as possible OD.
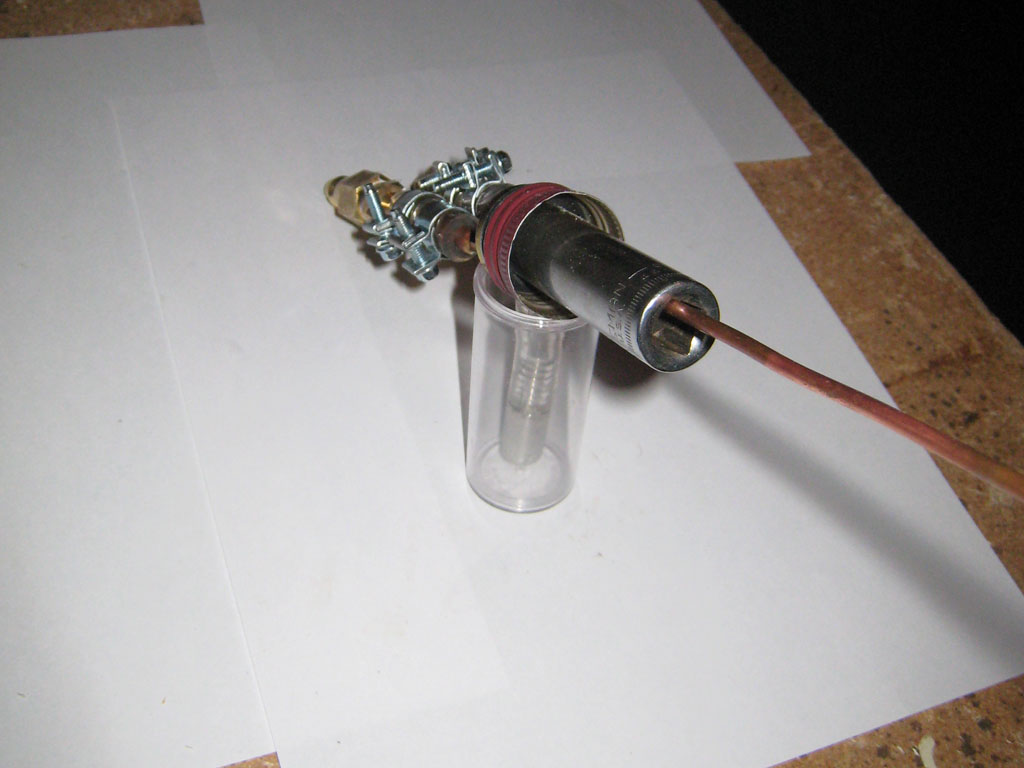
FIGURE 8 shows how I assembled the cap. That's a deep 9/16" socket shown, with a 3/8" drive (the square hole that the copper fits through). This is also key, as otherwise, you can't assemble the cap (as you can't fit a regular wrench into the underside of the screw cap).
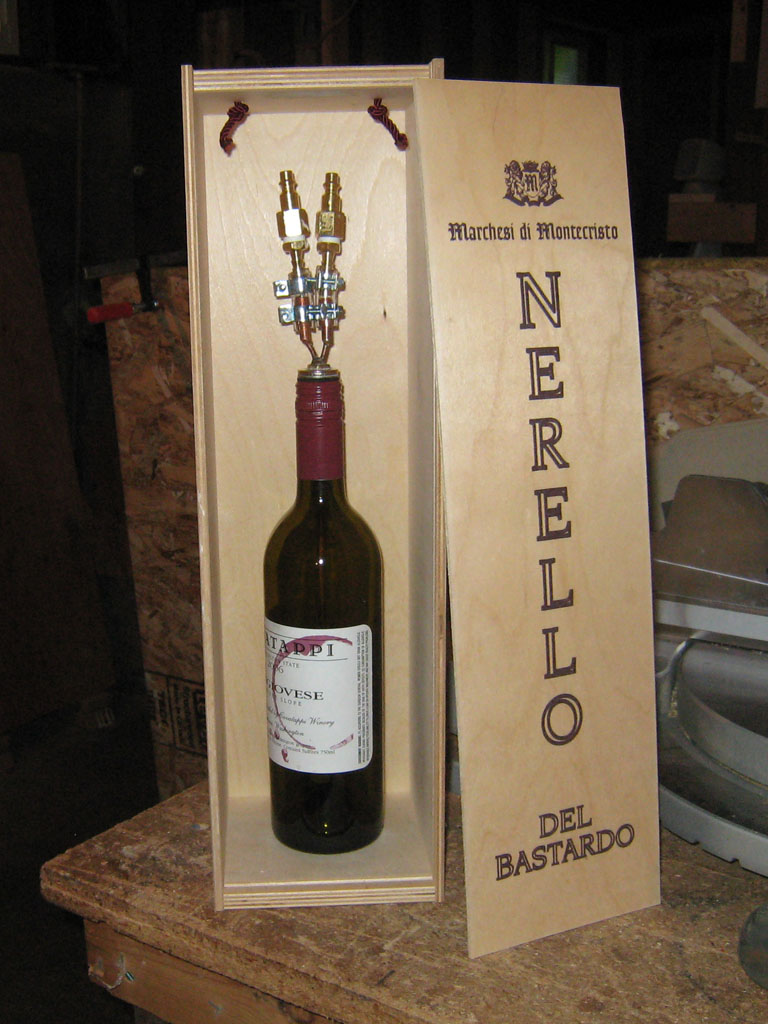
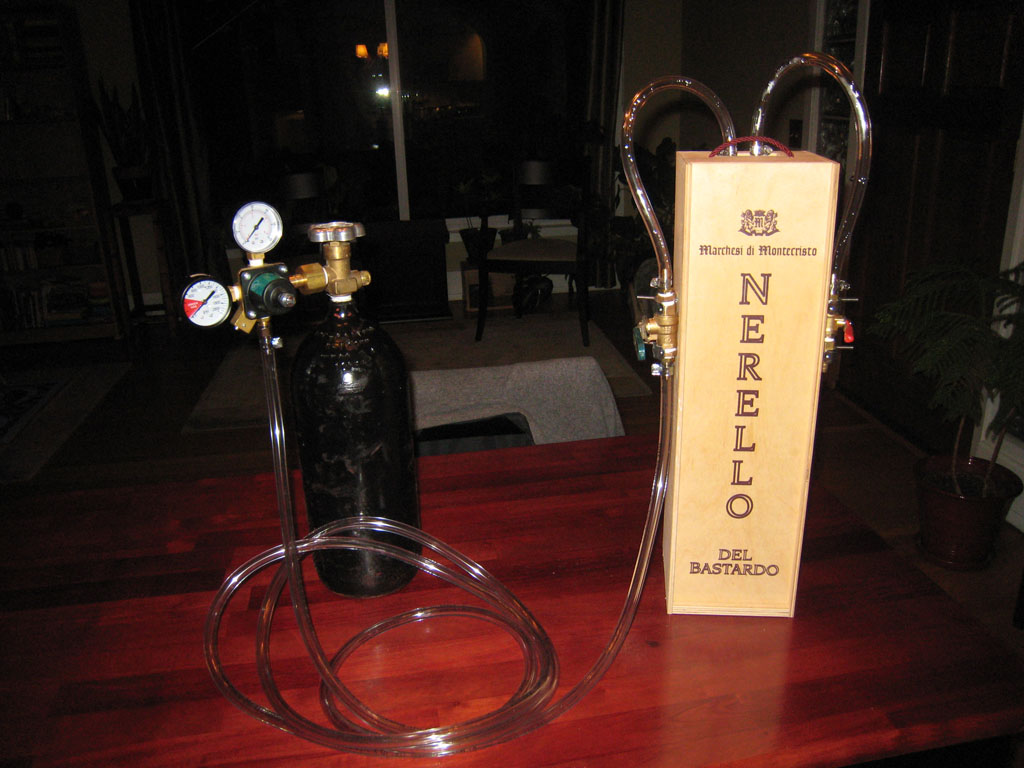
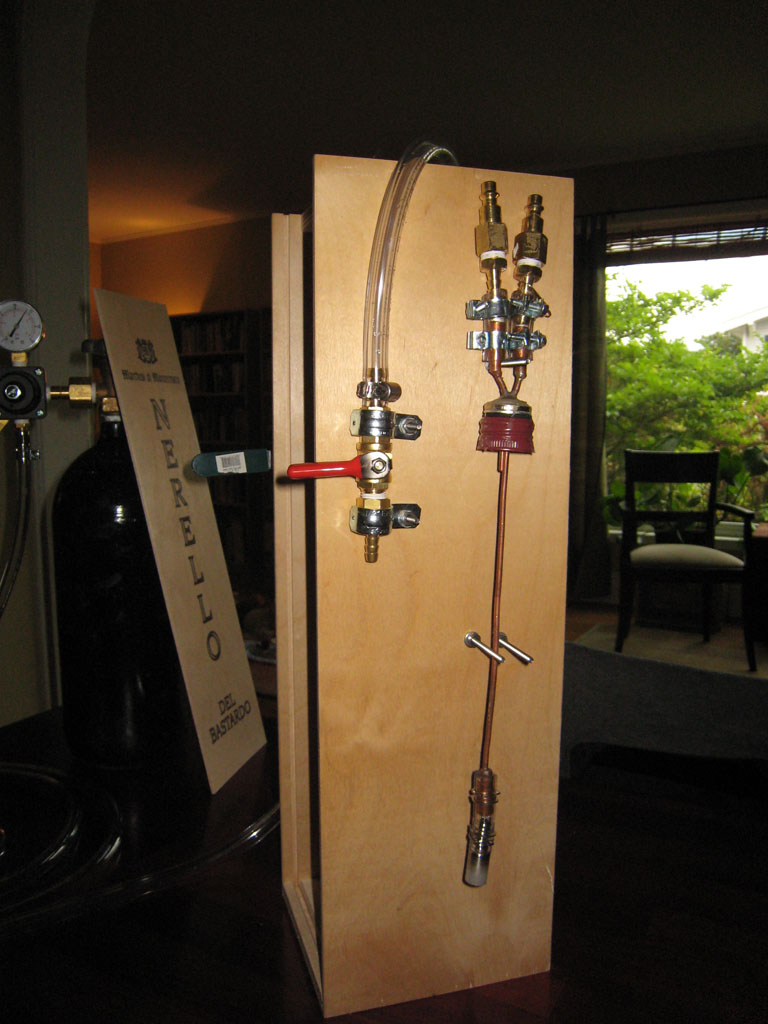
I haven't yet found a Max PSI rating for a standard glass wine bottle ... so in the meantime, I'm carbonating inside of an oversized wine box (shown in FIGURE 9). This box used to house a massive bottle of Nerello, which is a medium-bodied red Italian wine[1]. It's perfectly sized for carbonating water inside of a standard wine bottle.
I have to admit the most problematic part of the entire project was cutting a 4" x 2" hole in the top of the wine box for the air couplers to go through.
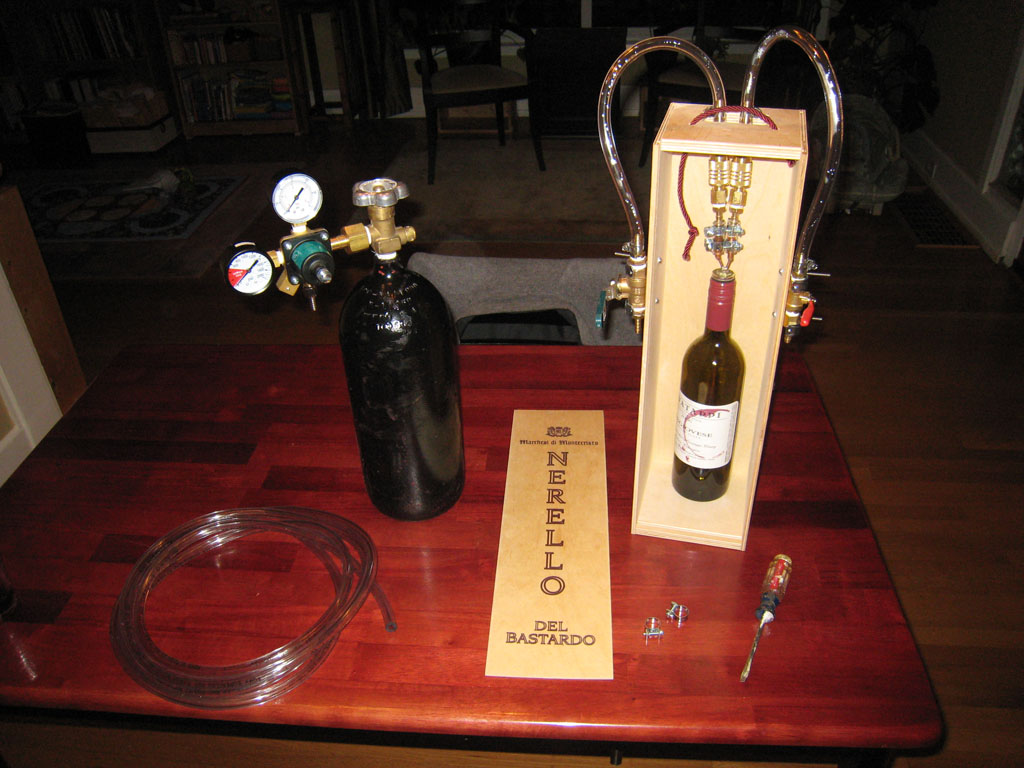
FIGURE 10 shows the entire assembly, ready for carbonation. The additional parts I needed are as follows:
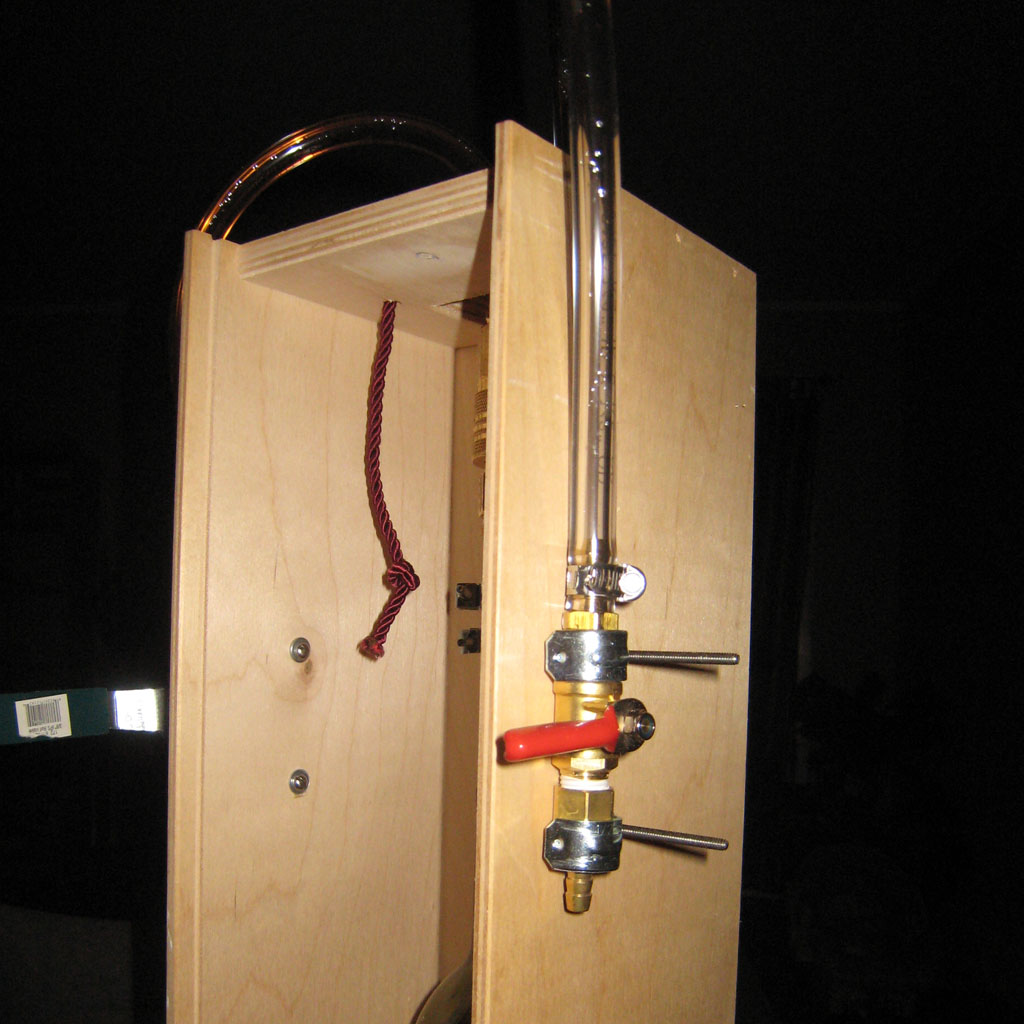
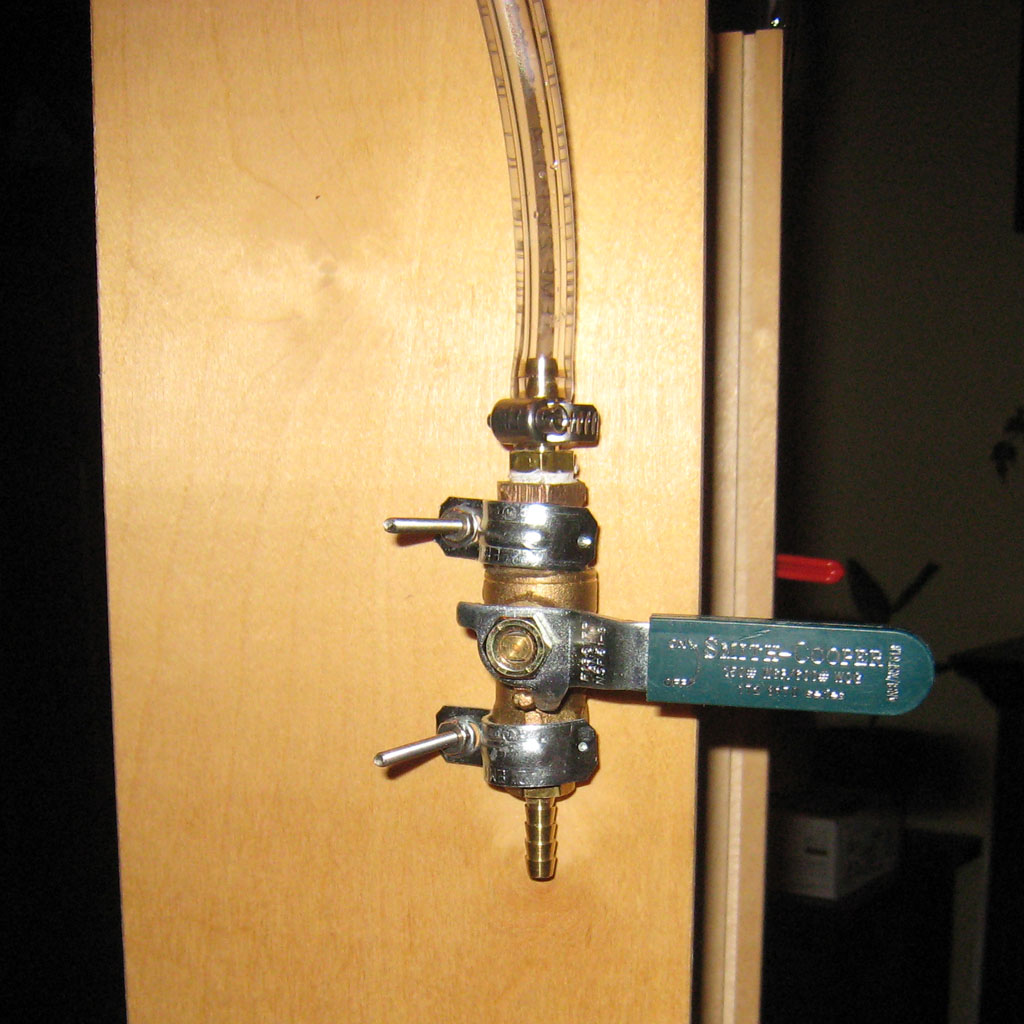
- A pair of lever-actived ball-valves, bolted to the sides of the box
- The other side of the quick-couplers for the air lines.
- A half-dozen brass 1/4" hose barbs, all of them are 3/8" threaded I believe.
- A half-dozen 1/2" hose clamps.
All of this came from Home Depot and cost approx $20.
Carbonating is relatively easy. The steps are as follows:
- Fill a wine bottle with cold water.
- Screw the carbonator assembly onto the bottle.
- Put the bottle in the wine box.
- Attach the 2 air couplers.
- Put the front of the box back on ... in case the bottle shatters.
- Turn on the IN CO2 feed... you'll hear the CO2 fill the bottle.
- Open the OUT valve, just a little, let some of the air escape, then close this.
- Let the bottle sit under pressure for 10 seconds.
- To get some flow, and agitation going, you can open the OUT valve a little and the CO2 will begin to cause a standing wave in the water within the bottle.
- Shut off the IN valve.
- Open the OUT valve to release the pressure within the bottle.
- Take the front off of the box, relase the two couplers, unscrew the carbonator assembly.
The total cost for misc hardware and welding was $50.
The total cost for the entire project was:
- $70 for the 5lb CO2 tank
- $60 for the regulator so I could dial the CO2 pressure down to 10-60PSI
- $30 for misc parts
- $20 for welding
- $20 for the carbonation stone
... which is $200 total.
There are a handful of design flaws here ... they are:
- There's no support at the top of the carbonator assembly for the 2 1/8" copper tubes ... meaning, it wouldn't be too difficult to bend one (or both) of them while attaching (or releasing) the quick-relase air couplers.
- The quick-release air couplers are easy enough to connect, but they're not so easy to disconnect... they're also obviously overkill in that they're far too big/beefy.
- IMO the wine bottle is not a good long-term solution. I need either (a) a wine-bottle screw-cap that won't wear out so quickly, or (b) an entirely different bottle.
- There's no agitator. I may buy a "bottle-stirrer" from a sceintific supply company. Apparently, for $50, you can get the plate itself and a handful of agitators to put inside of a handful of bottles ... the plate will spin the agitator in the bottle and increase the level of carbonation.
To build the Carbonator Assembly:
| No. | Description | Cost |
|---|---|---|
| 1 | 2' length of 1/8" copper tube | $2 |
| 1 | 1' length of 1/4" copper tube | $1 |
| 1 | 3/8" OD, 1/4" ID brass sleeve, threaded on the outside, smooth on the inner cylinder ... with constant diameter (read: not pipe thread), approx. 1" long | - |
| 1 | 3/8" ID brass washer | - |
| 2 | 3/8" brass lock nut | - |
| 2 | 3/8" rubber washers... one of which needs to fit inside of a wine bottle's screw-cap | - |
| 1 | 3/8" brass machine bushing (essentially a thin washer) | - |
| 2 | 1/2" stainless steel retaining clips (for the carbonation stone connecting hose) | - |
| 1 | 2 micron stainless steel carbonation stone | $20 |
To build the Feed and Relief System:
| No. | Description | Cost |
|---|---|---|
| 1 | 5lb CO2 tank | $70 |
| 1 | CO2 pressure regulator, to mod our tank down from ~800psi to around 30 or 40psi | $60 |
| 2 | Brass lever-actived ball-valves | $4 each |
| 2 | Brass quick-relase air couplers | $4 each |
| 8 | Brass 1/4" hose barbs, all 3/8" male thread | $1 each |
| 10 | 1/2" hose clamps, metal unimportant | - |
| 1 | 5' of 1/2" OD, 1/4" ID flexible food grade tubing | $4 |
| 4 | 1.5" steel screws, w/ accompanying washers and 6/32" nuts if you choose to bolt the IN & OUT levers to the side of an empty wine box | - |
| 1 | Wooden box (or similar), or glasses, to protect against shattering glass[2] | - |
I hope this project advances the overall DIY carbonation effort. I'd like to see other designs ... particularly ones that transcend the basic "needle-valve-in-screw-cap-filled-with-an-air-chuck" design, which is a good start, but IMO will ultimately prove to not be flexible enough.
[0] Kudos to Mr Drysdale for the excellent video.
[1] And a fine wine indeed.
[2] For the safety-conscious among us.


 Feed
Feed


